Before you start
This guide walks you, the merchant, through everything from your first sign-in to rewarding your first customer. It takes about 20 minutes.
You’ll use two free apps:
| App | What you use it for |
|---|---|
| MyCurrency | Your business setup: you create your currency (your own loyalty points) and your branches here. |
| MyCurrency Checkout | Your merchant app for the counter: you send points to customers and run your staff accounts here. |
Every step below is marked with the app it happens in.
Have these ready:
- a Google or Facebook account, to sign in to MyCurrency
- your mobile number, which can receive texts and becomes your merchant login
- your staff member’s mobile number, if you want to add staff
Your path:
- Create your MyCurrency account.
- Create your first currency.
- Add your first branch.
- Create your merchant account in MyCurrency Checkout.
- Link your currency to the merchant app.
- Send points to your first customer.
- Add staff and give them points to send.
The screenshots follow an example merchant, Kape Tayo Coffee, whose currency is called Kape Points.
Create your MyCurrency account
MyCurrency
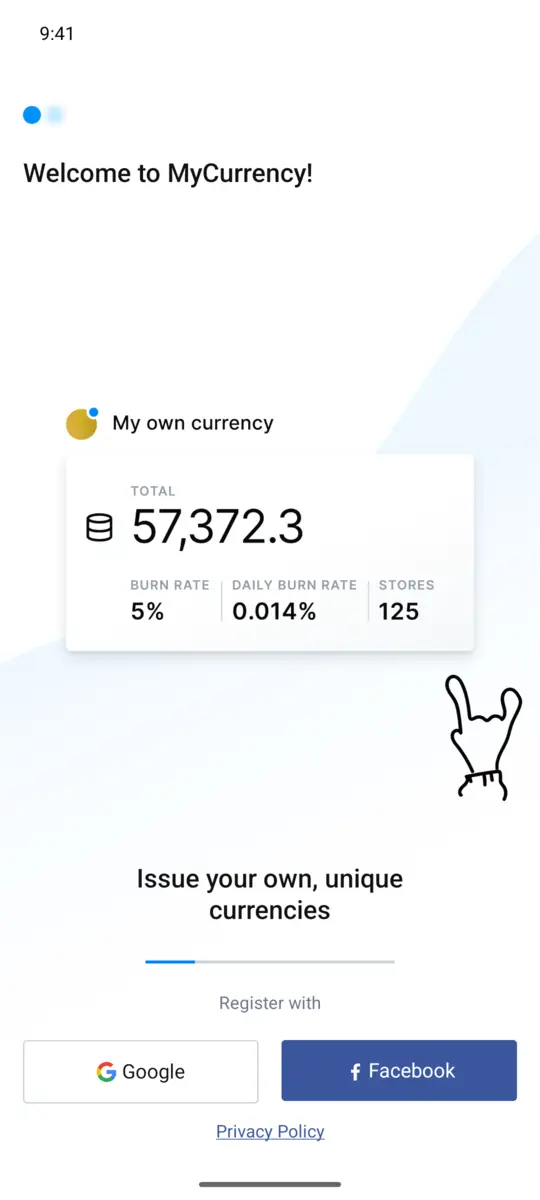
- Install and open the MyCurrency app, then tap Google or Facebook.
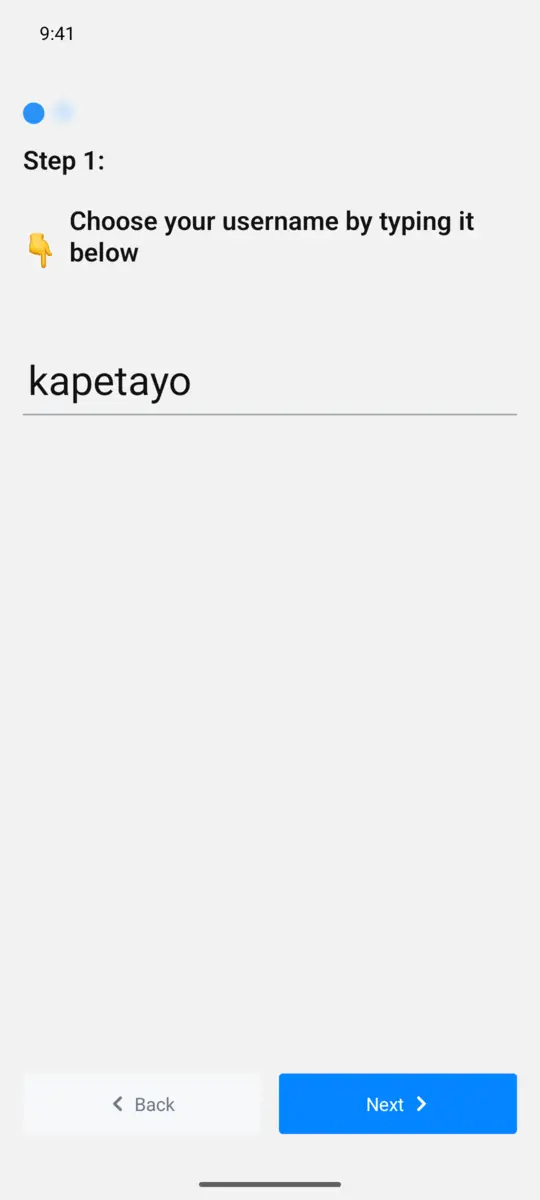
- Step 1: type a username for your business and tap Next. No spaces
(use
kape_tayo, notkape tayo). - Step 2: add a photo or your logo, or just tap Next.
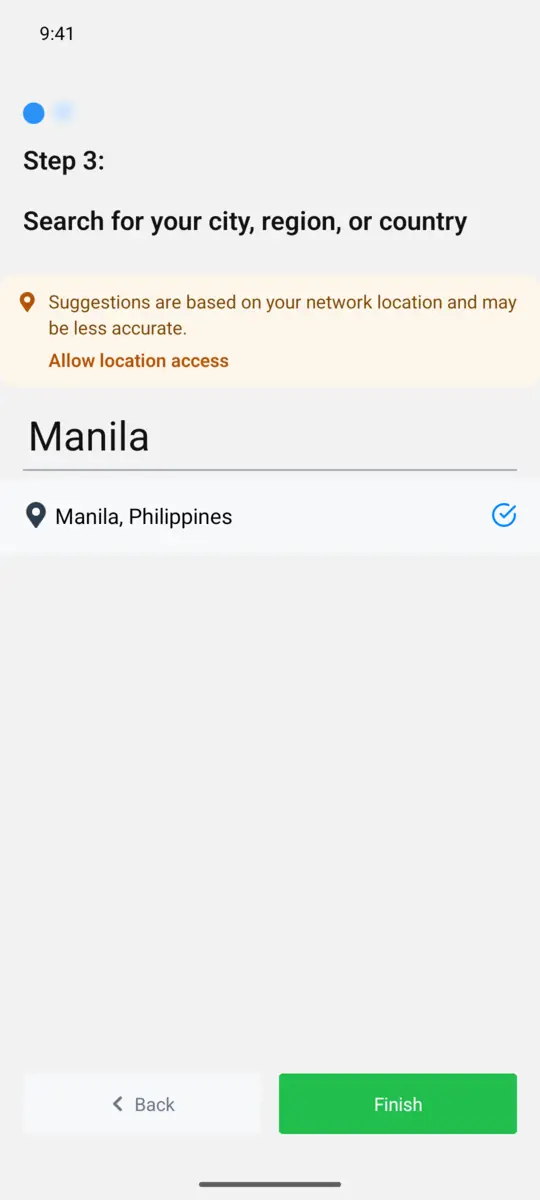
- Step 3: search for your city and tap it, then tap Finish.
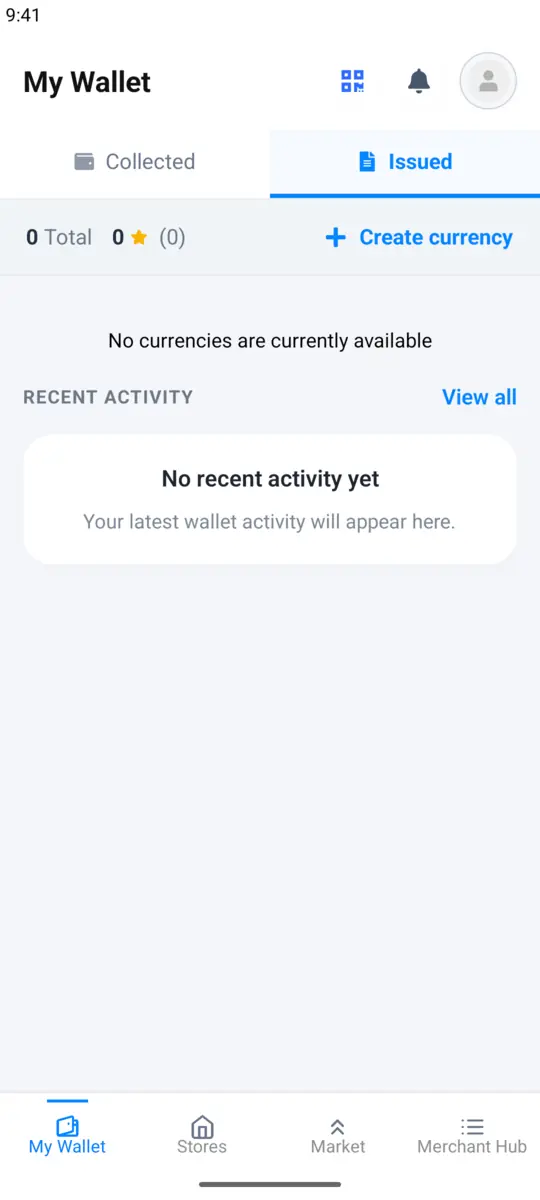
Your account is ready and My Wallet opens.
Important: your username is permanent. Choose one that fits your business.
Create your first currency
MyCurrency
Your currency is your own loyalty point. You give it to customers when they buy from you, and they spend it on your products.
- In My Wallet, open the Issued tab and tap Create currency.
- Step 1: Identity. Type your business name and a currency name (for example Kape Points). Pick a short code if you like, and tap the coin to add your logo.
- Step 2: Value. Your country’s money is already filled in. Choose how many points equal one peso. 1 point = ₱1 is the simplest.
- Step 3: Burn rate. This is how much unused points lose in value each year. Keep the recommended Burns gently (5% a year) if you’re unsure.
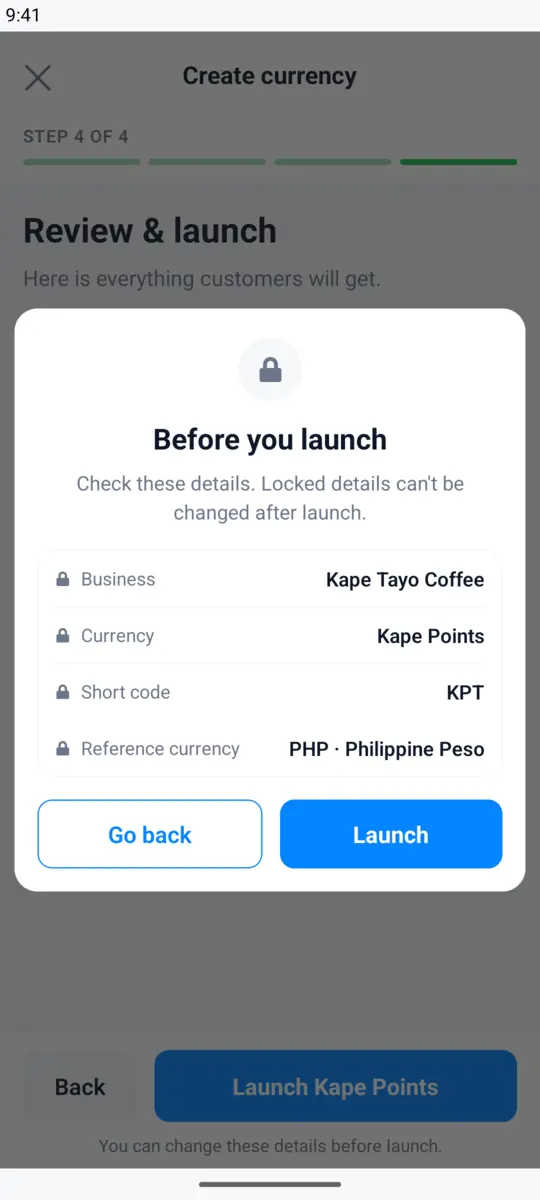
- Step 4: Review. Tick I confirm these details are correct and tap Launch, then Launch again in the Before you launch box.
Important: the business name, currency name, short code and your country’s money cannot be changed after you launch. On the review step these rows carry a small lock icon; tap it to see “Locked details can’t be changed after launch.” Tapping Launch shows one last Before you launch box listing those details: tap Go back to fix anything, or Launch to create the currency.
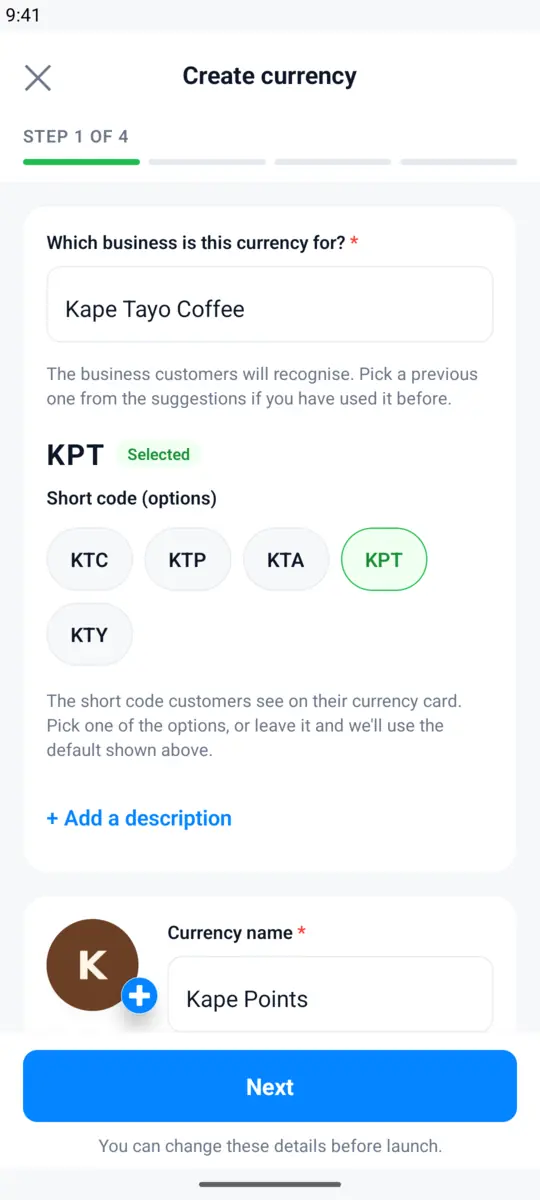
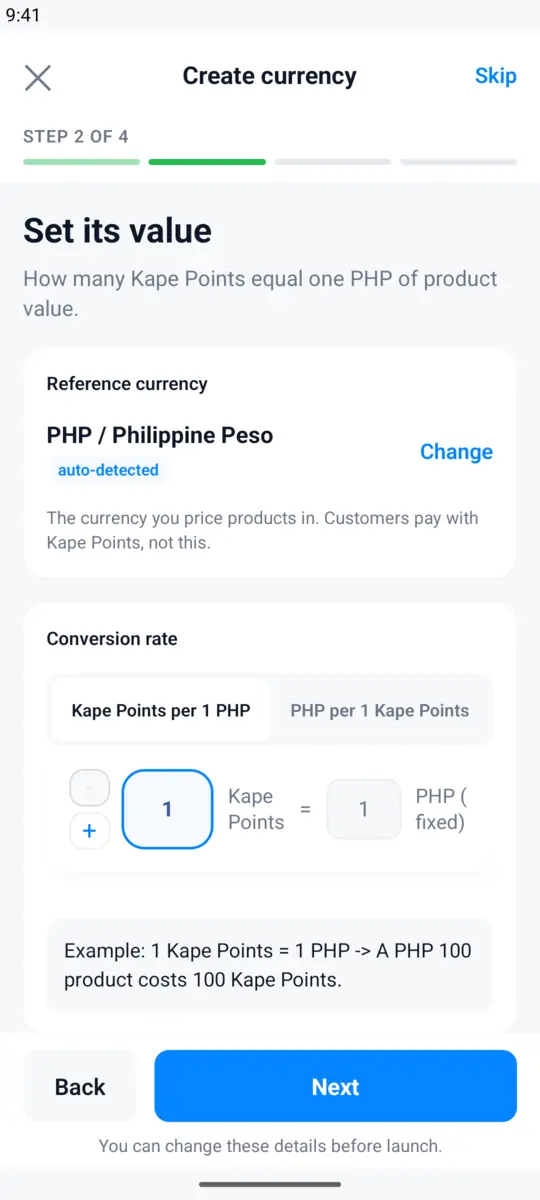
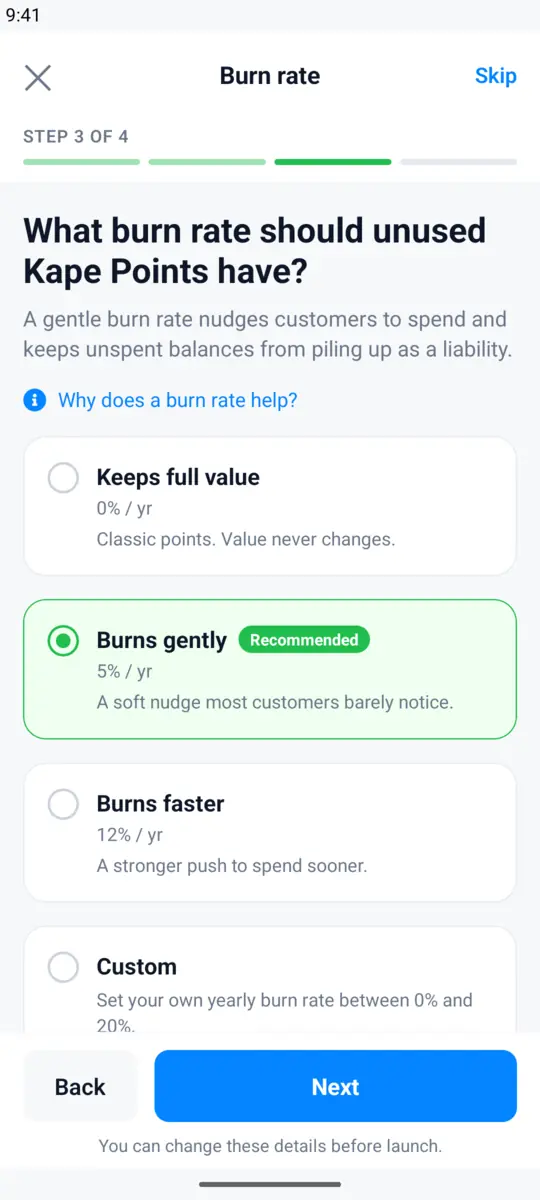
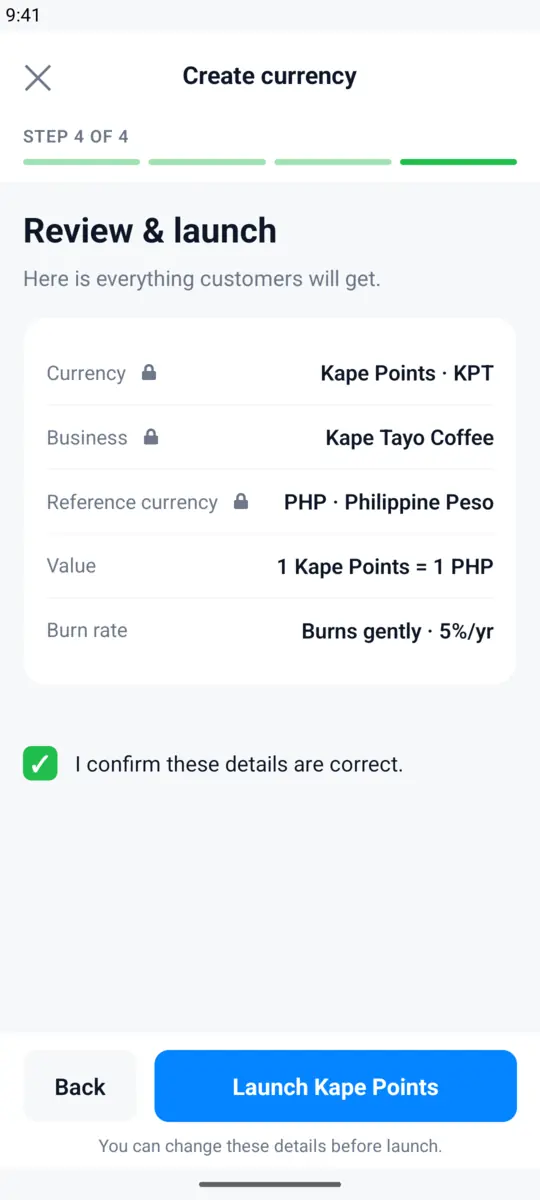
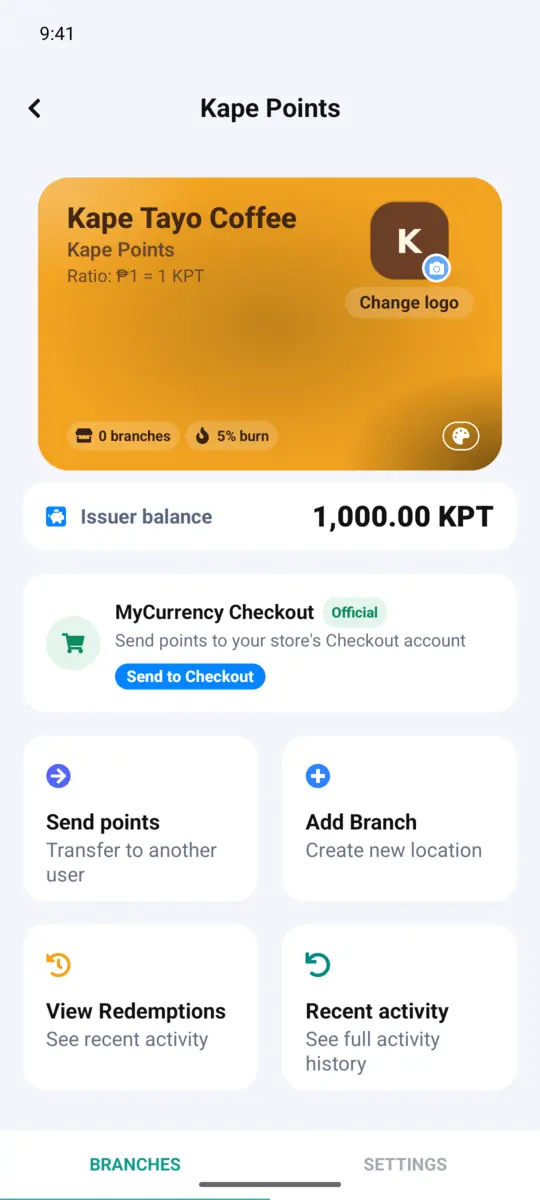
Your currency’s screen opens. You start with 1,000 points in your Issuer balance, free.
Add your first branch
MyCurrency
A branch is your store location. You can’t send points to customers until your currency has at least one.
- On your currency’s screen, tap Add Branch.
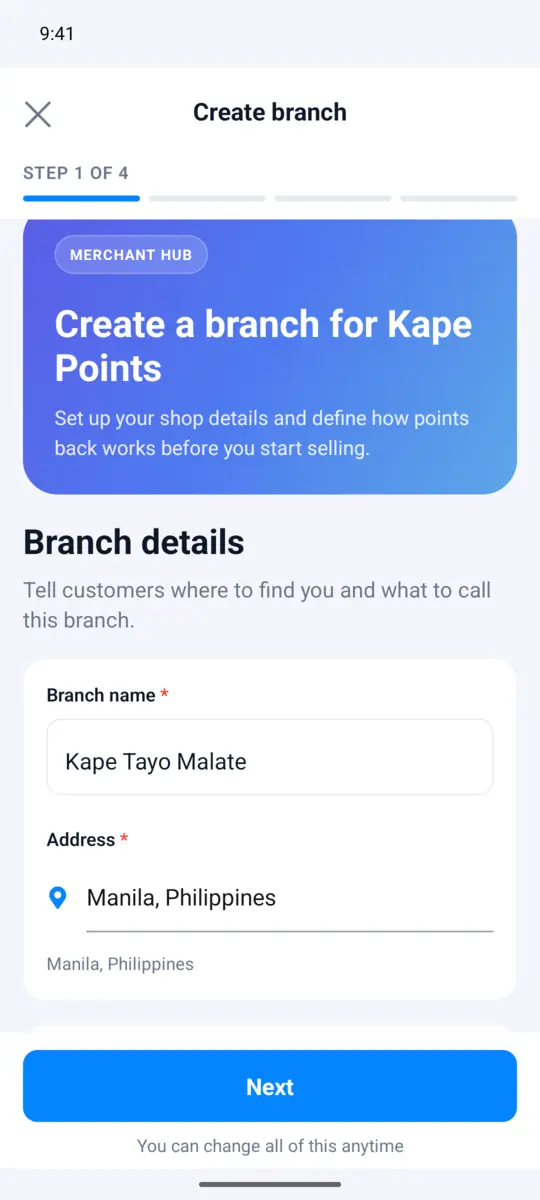
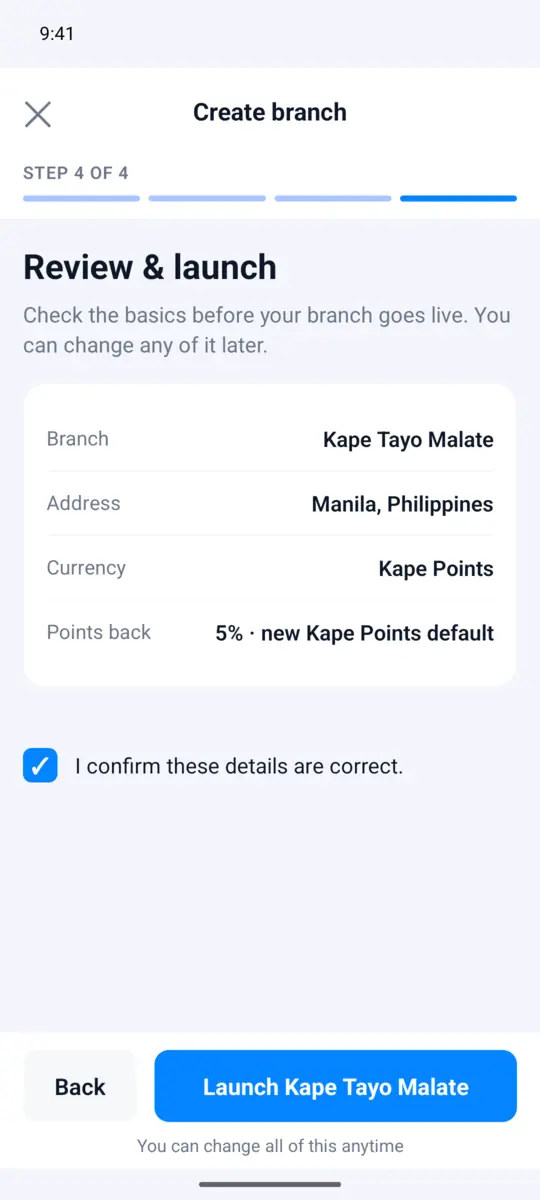
- Branch details. Type the branch name and tap Address to search for it. The branch name is permanent.
- Branch currency. Already set to your currency. Tap Next.
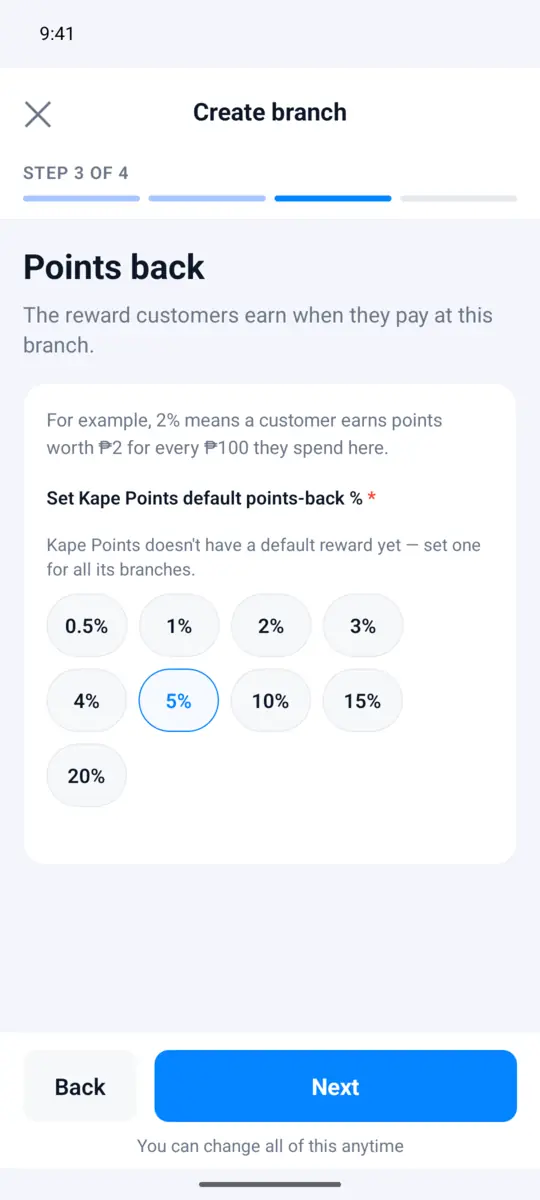
- Points back. Choose how much your customers earn when they buy something. At 5%, a ₱100 purchase earns ₱5 worth of points.
- Review. Tick I confirm these details are correct and tap Launch.
Create your merchant account
MyCurrency Checkout
Your merchant account lives in the MyCurrency Checkout app. Its icon reads MC Checkout.
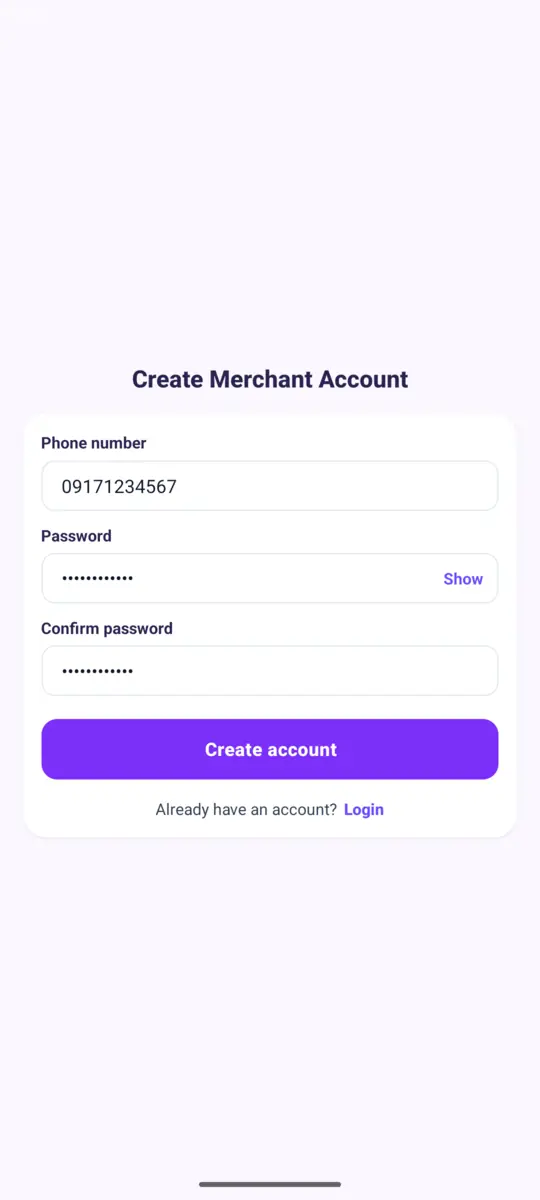
- Install and open the app, then tap Register.
- Enter your mobile number and a password (at least 8 characters) twice. Tap Create account.
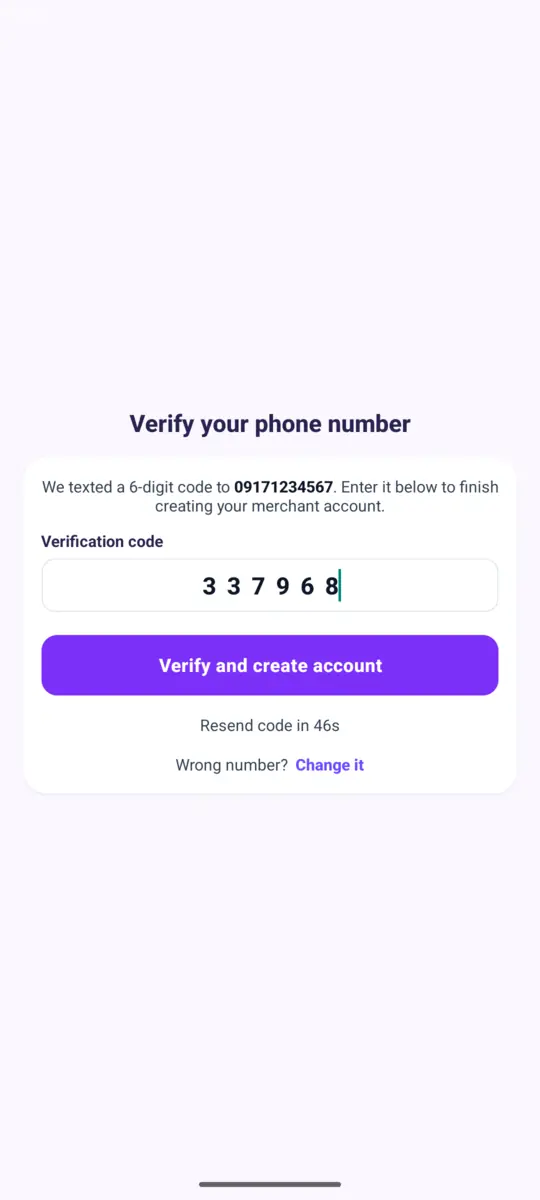
- You’ll get a text with a 6-digit code. Enter it and tap Verify and create account.
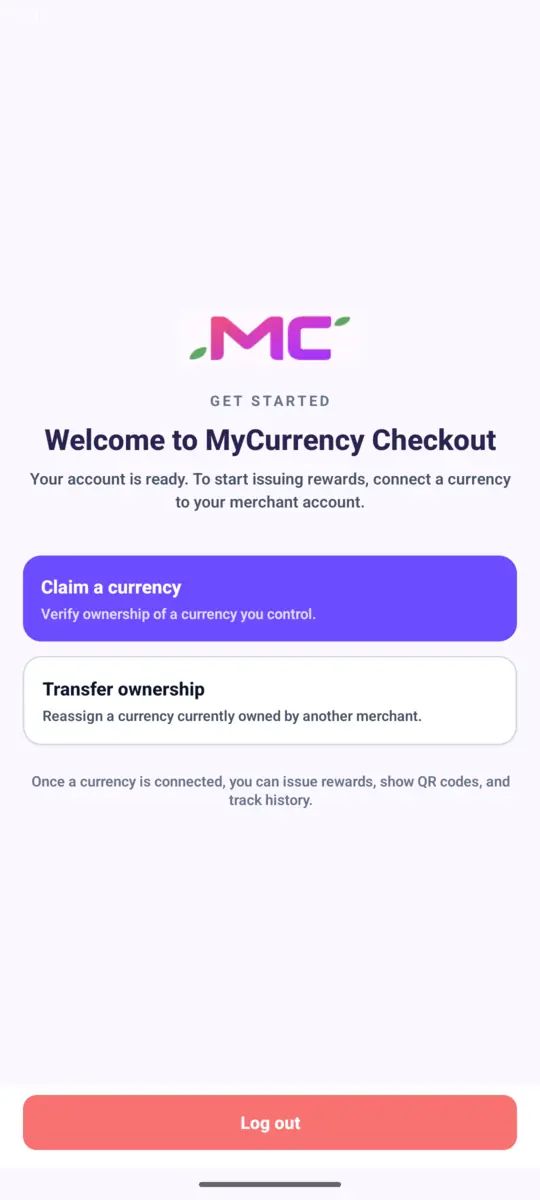
You’re signed in to your merchant account, and the Welcome to MyCurrency Checkout screen opens.
If the code doesn’t arrive, wait 60 seconds and tap Resend code. A code works for 10 minutes.
Link your currency to the merchant app
MyCurrency Checkout MyCurrency
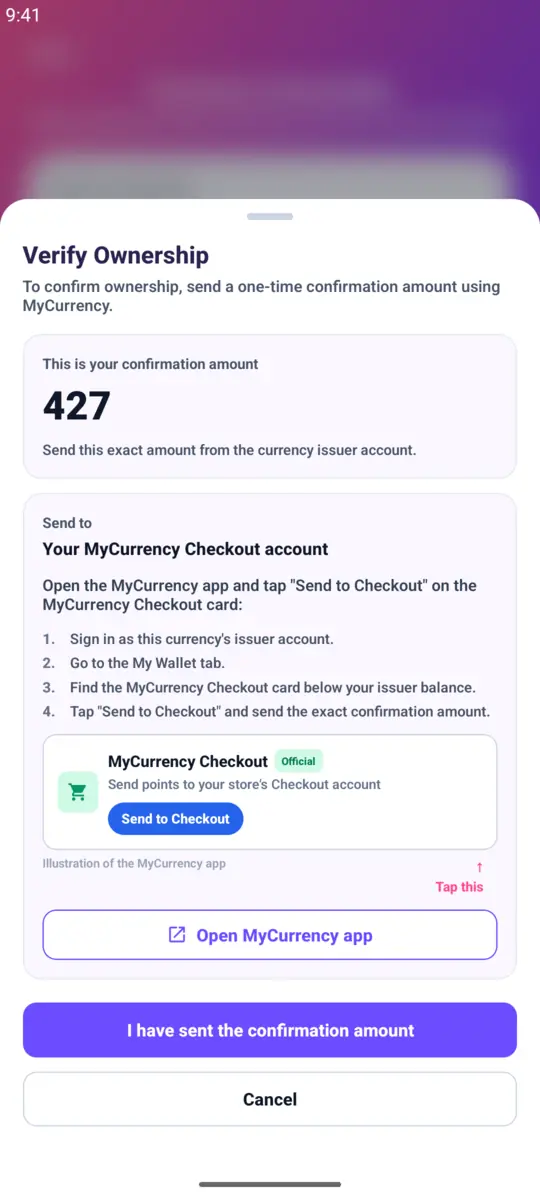
Now you link the currency you created to your merchant account. This proves the currency is yours: the merchant app gives you a number, and you send exactly that many points from MyCurrency.
In the merchant app:
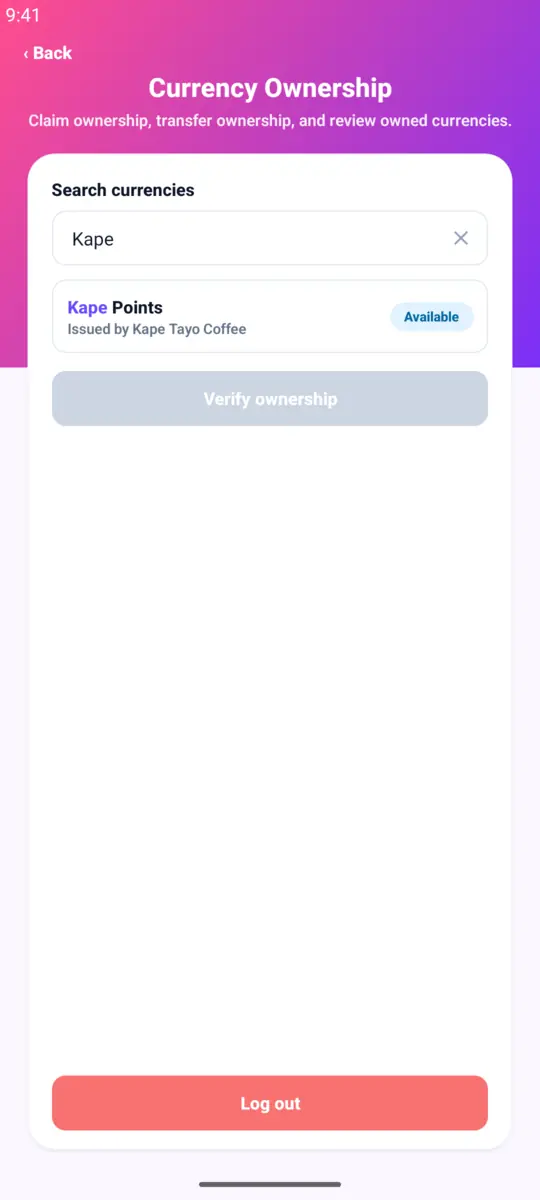
- Tap Claim a currency.
- Type your currency’s name. Tap it when it shows Available.
- Tap Verify ownership. Write down the confirmation amount (in the example, 427) and keep this screen open.
Then, in the MyCurrency app:
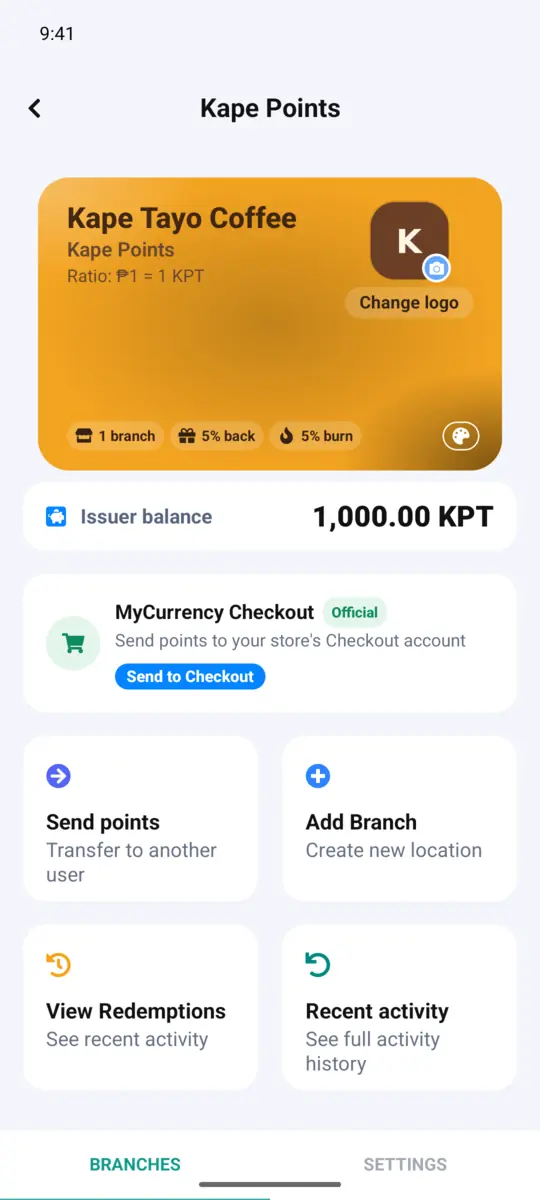
- Go to My Wallet → Issued and tap your currency.
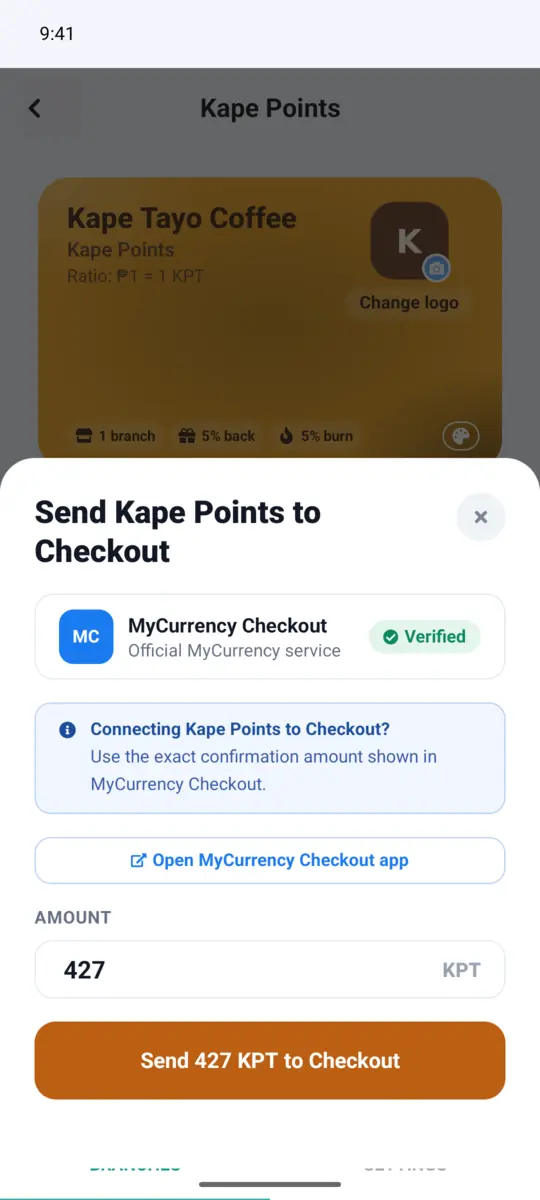
- On the MyCurrency Checkout card, tap Send to Checkout.
- Type the confirmation amount exactly and tap Send … to Checkout.
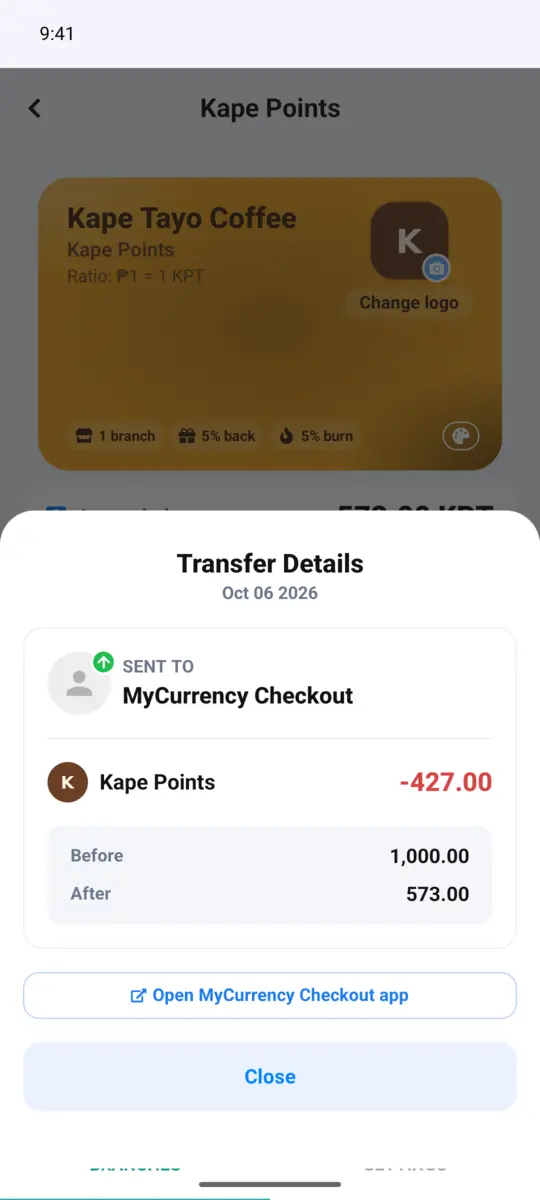
Back in the merchant app:
- Tap I have sent the confirmation amount.
After a few seconds you’ll see You now own this currency, and your merchant Home opens. The points you sent are yours to give out. They show under Available to issue.
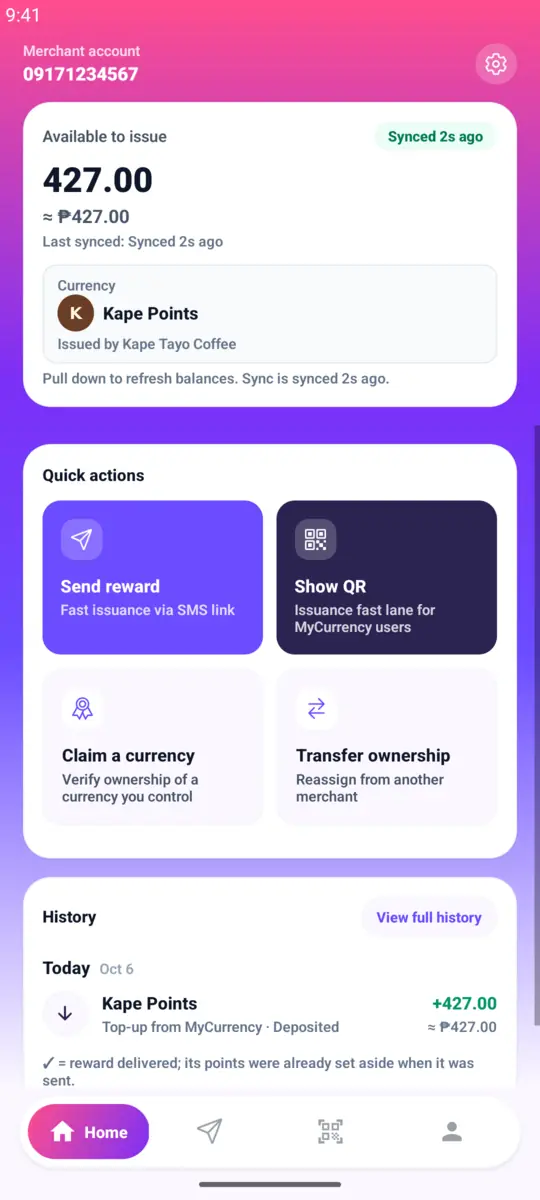
Important: send the amount within 15 minutes of tapping Verify ownership. If you sent the wrong amount, don’t start again. Send the exact amount, then tap Retry verification. If time ran out, tap Start a fresh claim. Points you already sent are never lost; they’re added to your account once the link succeeds.
Need more points to give out later? Repeat steps 4 to 6 with any amount. If you send more than your Issuer balance, MyCurrency creates the extra points for you and shows the platform fee before you confirm.
Send points to a customer
MyCurrency Checkout
This is what you’ll do every day at the counter. Your customer doesn’t need the MyCurrency app; their mobile number is enough.
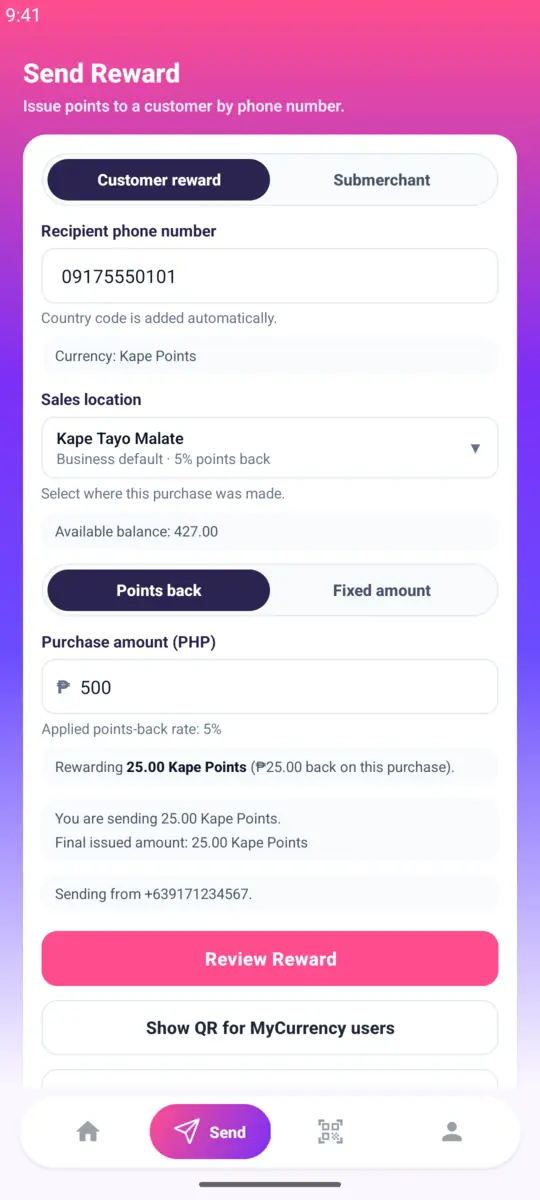
- Open the Send tab (or tap Send reward on Home). Keep the toggle on Customer reward.
- Type the customer’s mobile number.
- Under Sales location, pick the branch where they bought.
- Under Purchase amount, type what they spent. The app works out their points from your branch’s rate (₱500 at 5% earns 25 points).
- Tap Review Reward, check the details, then tap Confirm & Send.
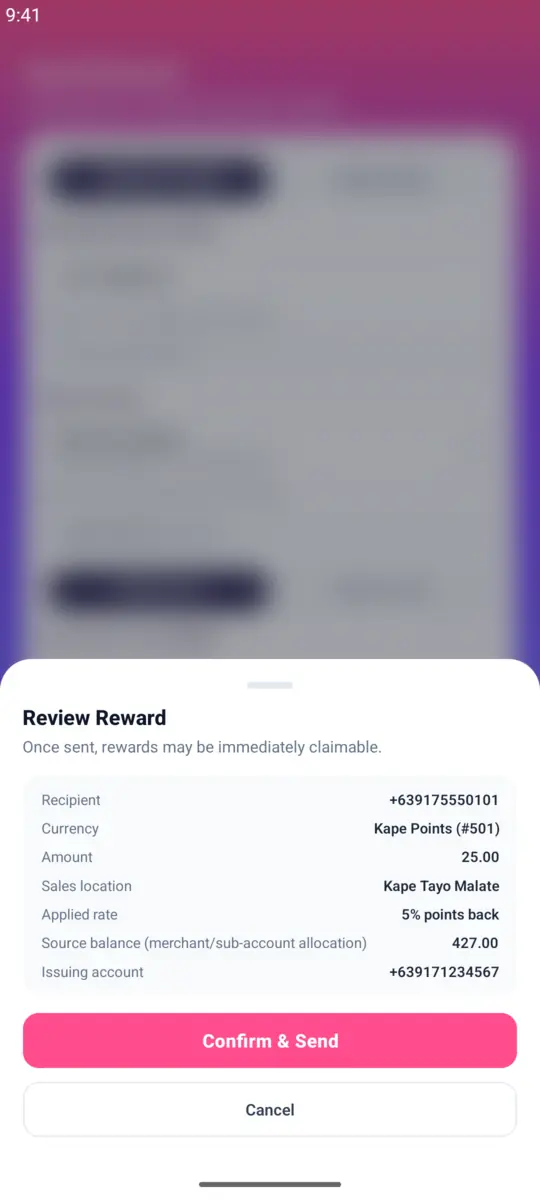
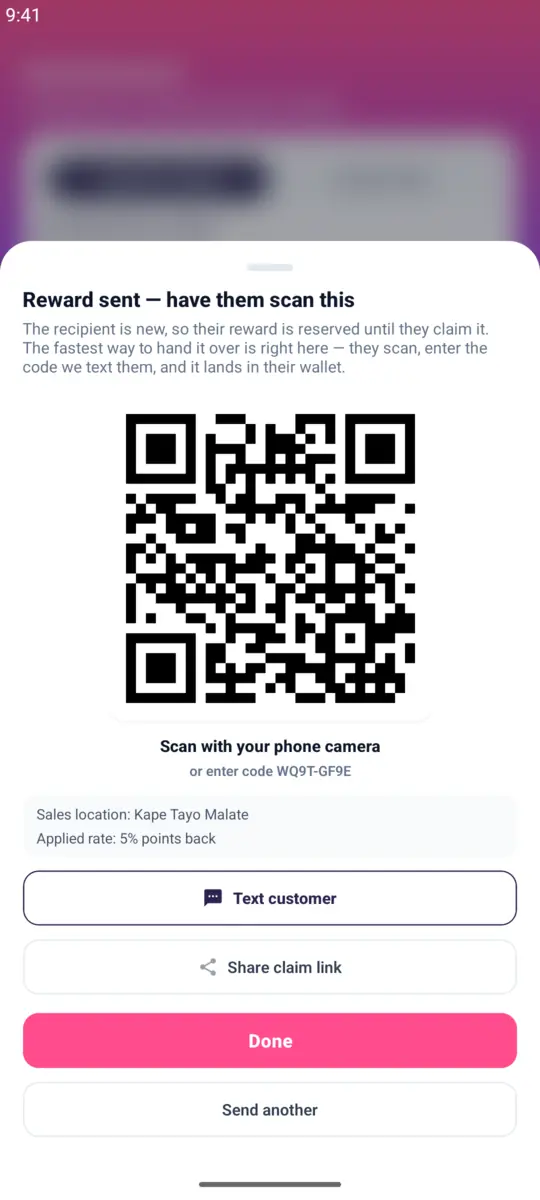
For a first-time customer, the screen reads Reward sent — have them scan this. Ask them to scan the QR code with their phone camera before they leave. They enter the code they get by text, and the points land in their rewards wallet. If they can’t scan, tap Text customer or Share claim link.
They also get a text like this:
You received 25 Kape Points from Kape Tayo Coffee. Claim your reward: www.microcurrency.com/…
For a returning customer, the points reach their wallet straight away.
Tip: always offer the QR code at the counter. Some networks block texts that contain links, and the QR code works either way.
Add a staff subaccount
MyCurrency Checkout
Give each staff member their own subaccount so they can send points to customers without using your login. Staff can’t link currencies or manage other staff.
- On Home, tap the gear icon, then Subaccounts.
- Tap Invite a submerchant, enter your staff member’s mobile number, and tap Send invite.
- Your staff member gets a text with a link. They need the MyCurrency Checkout app installed. The link opens Accept Submerchant Invite, where they choose a password and tap Accept invite.
Once they accept, they appear under Active staff.
The invite link works for 7 days. If it expires, send a new invite. Only the newest link works.
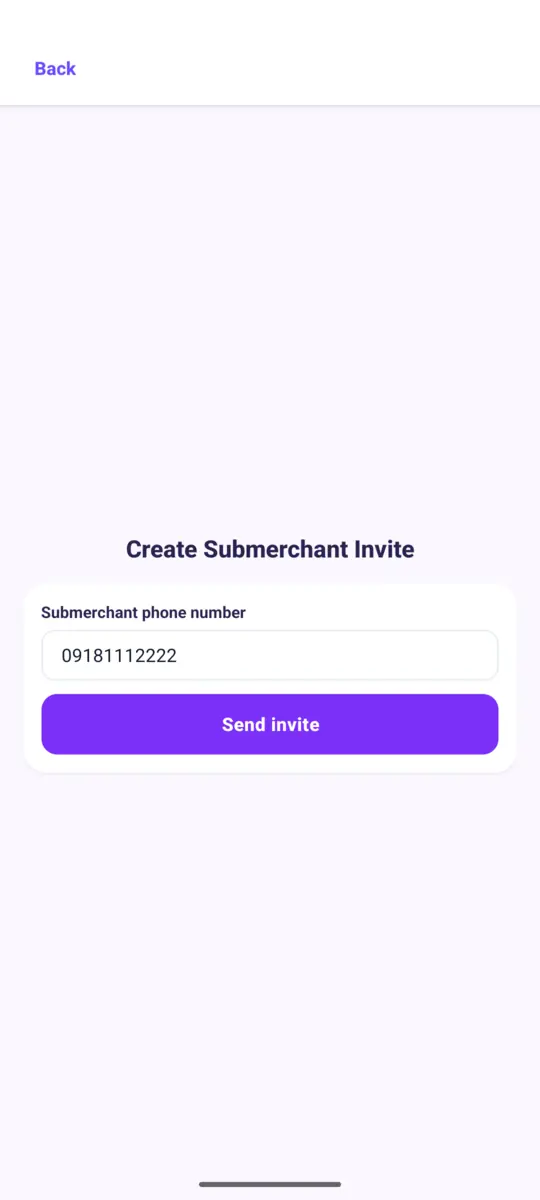
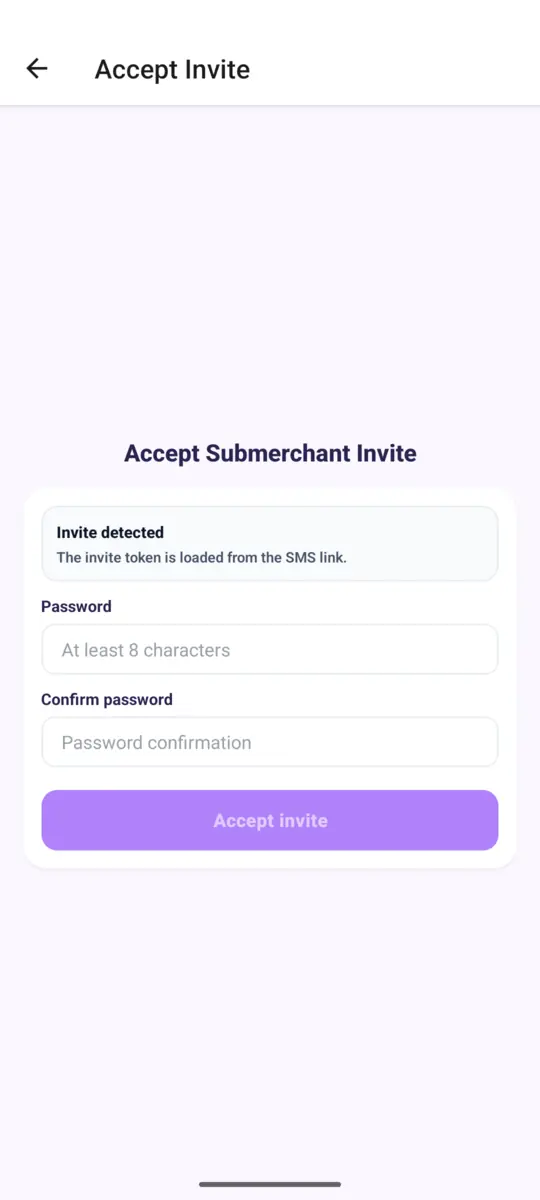
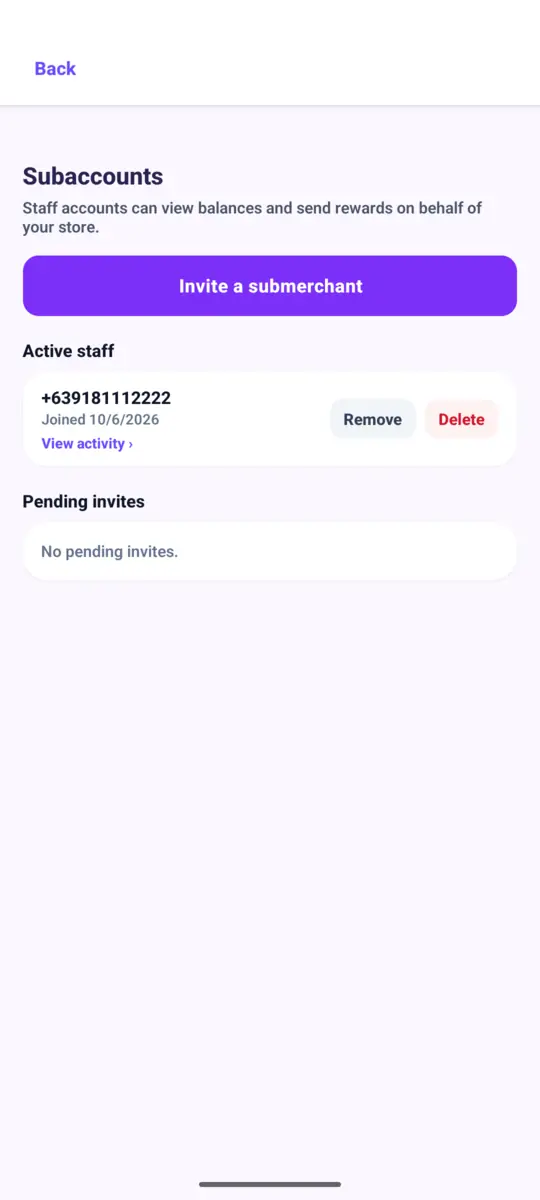
Give your staff points to send
MyCurrency Checkout
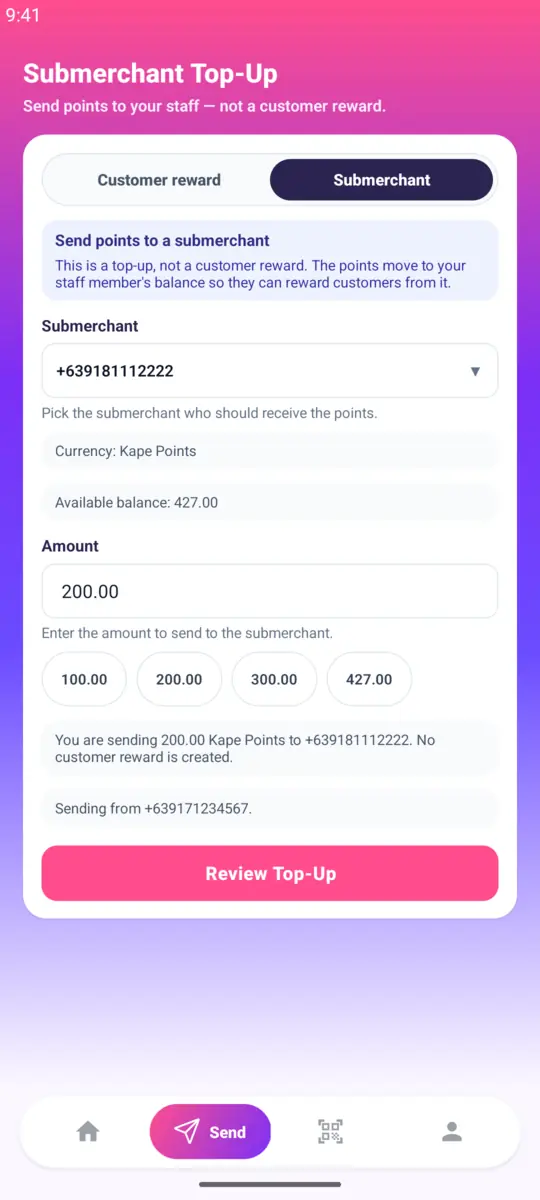
A new subaccount starts with no points. Top it up from your balance, and your staff member can then send points to customers exactly as in section 7.
- Open the Send tab and switch the toggle to Submerchant.
- Pick your staff member under Submerchant.
- Enter an amount, or tap one of the quick amounts. You can send up to your available balance.
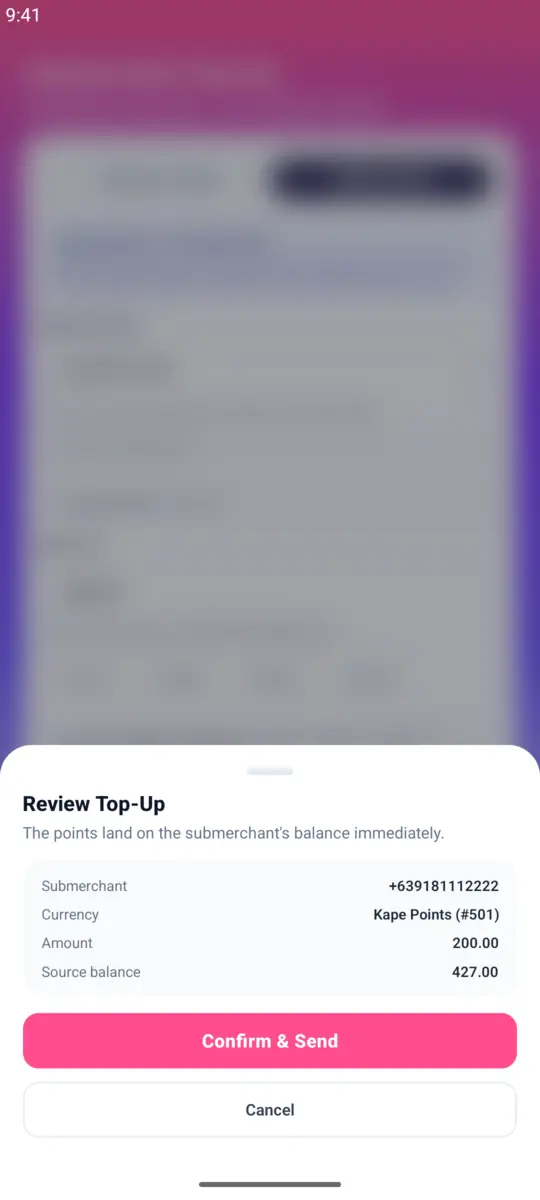
- Tap Review Top-Up, check the details, then tap Confirm & Send.
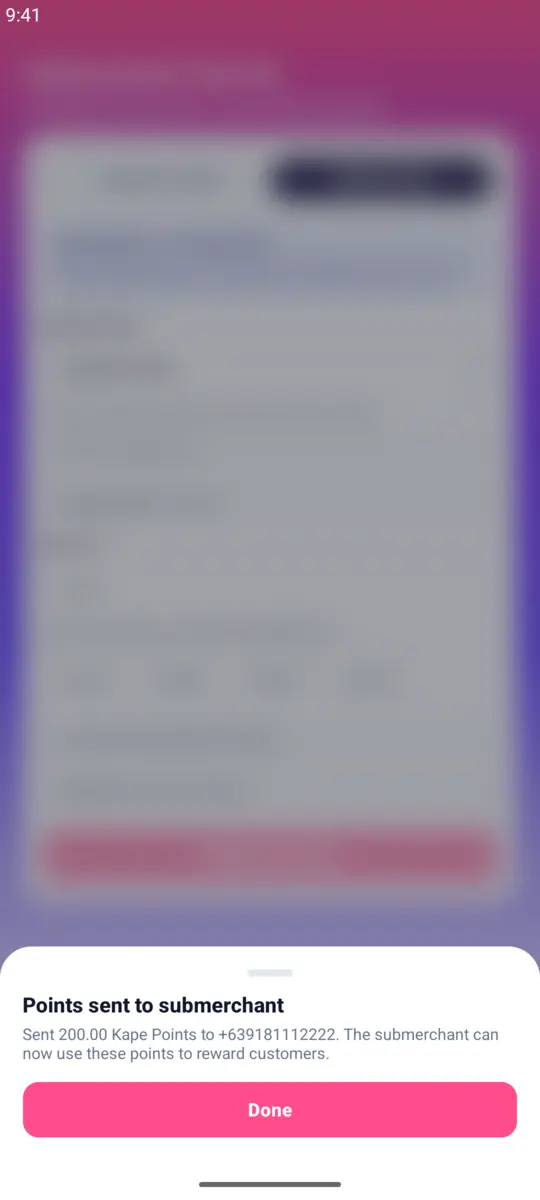
The points reach their subaccount straight away.
Important: you can’t take points back from a staff member. Only they can return them (on their Send tab, Return to merchant). If you Remove or Delete a subaccount, any points it still holds are frozen for good. Ask your staff member to return their points first.
What’s next
Your currency is live, it’s linked to your merchant app, and you and your staff can send points to customers.
- Add products in MyCurrency: open your branch and tap Add product, so customers have something to spend their points on.
- Show QR on merchant Home lets customers who already use the MyCurrency app scan to receive points.
Every feature is covered in detail in the two full guides:
- MyCurrency Checkout Guide, for the merchant app
- MyCurrency User Guide, for the MyCurrency app
Need help? Visit mycurrency.com/support. Have your merchant mobile number, the currency name, and a screenshot ready.